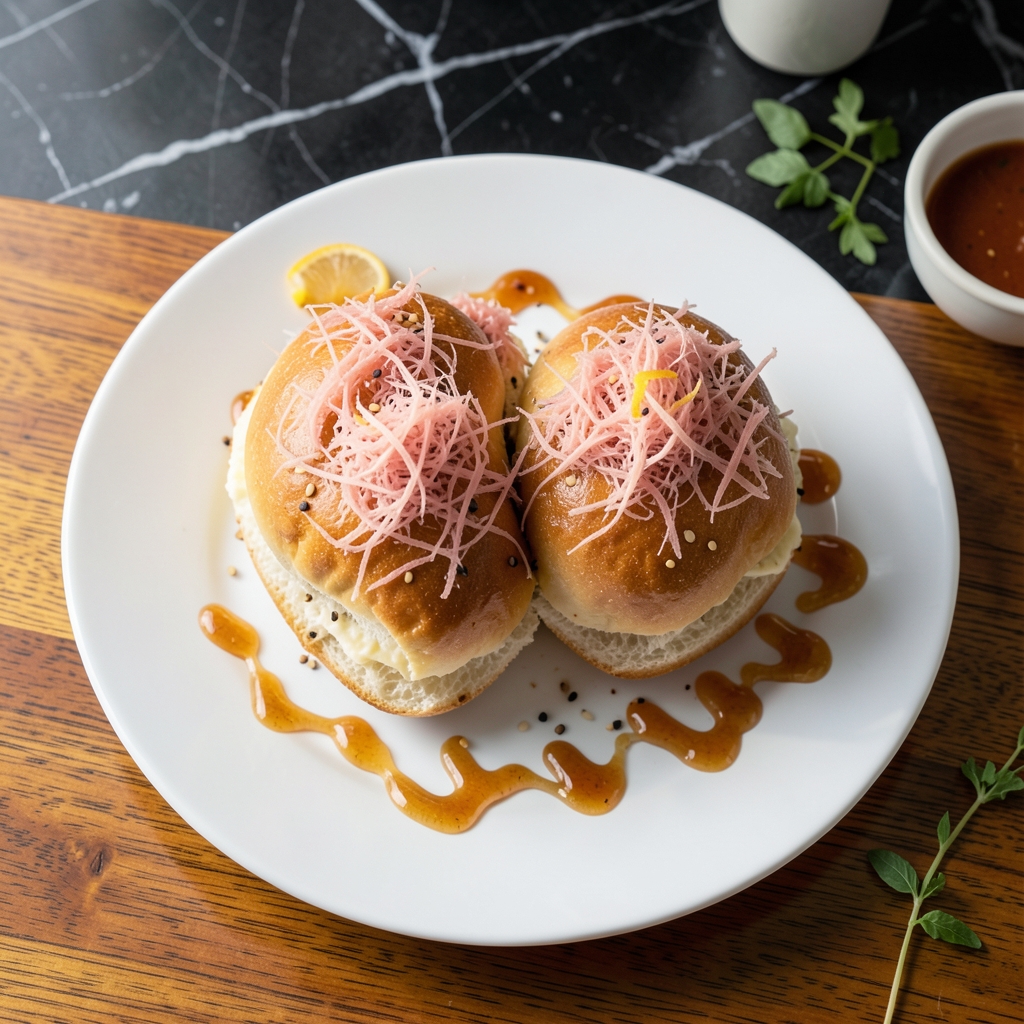
I first encountered pork floss buns during my apprenticeship in Charleston, where the balance of sweet and savory became a signature of my baking style. These buns deliver that same harmony with a soft, pillowy texture.
This creation combines a tender, slightly sweet dough with a salty pork floss topping that creates an addictive contrast. The dough requires patience but rewards with perfectly fluffy results every time.
The pork floss, made from slow-cooked pork shoulder, gets shredded into cotton-like strands and sweetened just enough to complement the bread. It’s a technique I’ve refined over years of working with heritage pork.
Once assembled, these buns bake to golden perfection with a topping that’s both crisp and melt-in-your-mouth tender. The result is a snack that’s as satisfying to make as it is to eat.
Ingredients for Breadtalk Pork Floss Bun
Soft dough meets crispy pork floss—just a few ingredients create this iconic sweet-savory balance.
| Ingredient | Amount | Notes |
|---|---|---|
| Bread Flour 🌾 | 3 ½ cups | High protein for chewy texture |
| Granulated Sugar 🍚 | ¼ cup | Dissolved in warm liquid |
| Active Dry Yeast 🍞 | 2 ¼ tsp | One packet, proofed in warm water |
| Whole Milk 🥛 | ¾ cup | Warmed to 110°F |
| Unsalted Butter 🧈 | 4 tbsp | Softened to room temperature |
| Large Egg 🥚 | 1 whole | Room temperature for binding |
| Salt 🧂 | 1 tsp | Fine sea salt preferred |
| Pork Shoulder 🥩 | 1 lb | Slow-cooked and shredded fine |
| Soy Sauce 🫒 | 2 tbsp | Low-sodium for balance |
| Granulated Sugar 🍚 | 1 tbsp | For caramelizing pork floss |
| Sesame Oil 🫒 | 1 tsp | Toasted for aroma |
| Neutral Oil 🫒 | 1 tbsp | For greasing bowl |
| All-Purpose Flour 🌾 | ¼ cup | For dusting work surface |
The flour is non-negotiable—King Arthur Bread Flour gives that pillowy structure you need. For the pork shoulder, heritage breed from a good butcher makes a difference (try Whole Foods or a local Asian market). Slow-cook it yourself for best texture, but pre-made pork floss from Asian grocery stores works in a pinch if you’re short on time.
No pork shoulder? Pork belly gives even richer floss, though it’s fattier. Out of soy sauce? Tamari or coconut aminos at a 1:1 ratio. For the milk, whole is essential—lower fat versions won’t yield the same tender crumb. If you’re avoiding dairy, full-fat coconut milk (canned) can substitute, but the flavor profile shifts slightly.
Dough can be prepped a day ahead—let it rise in the fridge overnight for deeper flavor. The pork floss keeps in an airtight container for 1 week at room temp, or 1 month frozen. Buns are best eaten fresh but reheat well at 350°F for 5-10 minutes.
Why You’ll Love This Recipe
- No-Fuss Dough: The yeast does most of the work—just mix, knead once, and let it rise while you prep the pork floss.
- Sweet-Savory Magic: That buttery richness from the whole milk and unsalted butter pairs ridiculously well with the salty pork floss.
- Breakfast or Snack: I’ll pack one for lunchboxes or serve warm at brunch. Honestly, it fits any time of day.
- Budget Stretch: A little pork floss goes a long way, making these buns feel indulgent without breaking the bank.
Step-by-Step Instructions for Pork Floss Buns
These soft, pillowy buns come together beautifully with a few key techniques.
Step 1: Activate the Yeast and Begin the Dough
Warm the 0.75 cup Whole Milk to 110°F—it should feel just warm to the touch, not hot. In a stand mixer bowl, combine the warmed milk with the 0.25 cup Granulated Sugar and 2.25 tsp Active Dry Yeast. Let this mixture sit for 5-7 minutes until it becomes frothy and slightly domed.
This proofing step confirms your yeast is alive and active. If it doesn’t bubble, your water might have been too hot or the yeast too old. Once frothy, add the 1 whole Large Egg and 4 tbsp Unsalted Butter, mixing on low until just combined.
Step 2: Knead and Proof the Dough
Add the 3.5 cups Bread Flour and 1 tsp Salt to the yeast mixture. Using the dough hook attachment, knead on medium speed for 8-10 minutes until the dough is smooth, elastic, and slightly tacky. If it sticks to the bowl, add a little more bread flour, 1 tablespoon at a time.
Transfer the dough to a lightly greased bowl using the 1 tbsp Neutral Oil. Cover with a clean kitchen towel and let it rise in a warm, draft-free place for 1-1.5 hours, or until doubled in size. The dough should spring back slowly when poked gently with a finger.
Step 3: Shape the Buns and Prepare the Pork
Punch down the risen dough and turn it out onto a surface dusted with the 0.25 cup All-Purpose Flour. Divide the dough into 12 equal pieces and shape each into a smooth ball. Place them on a parchment-lined baking sheet, leaving 1-2 inches between each bun.
While the buns rise, cook the 1 lb Pork Shoulder in a pot of simmering water for 1.5-2 hours until fork-tender. Shred finely, then mix with 2 tbsp Soy Sauce, 1 tbsp Granulated Sugar, and 1 tsp Sesame Oil in a dry pan over medium heat for 10-12 minutes, stirring often, until caramelized and crispy.
Step 4: Bake and Top the Buns
Preheat your oven to 350°F. Once the buns have puffed up noticeably (about 30-45 minutes), bake for 15-18 minutes until they’re golden brown and sound hollow when tapped on the bottom.
Remove the buns from the oven and let them cool slightly. While still warm, generously top each bun with the prepared pork floss, pressing gently to adhere. Serve warm—the contrast of the soft, fluffy bun with the salty-sweet pork floss is what makes this dish irresistible.
Pro Tips For Making Breadtalk Pork Floss Bun
- Activate Yeast Properly: Proof your active dry yeast in warm whole milk (about 110°F) with a pinch of sugar for 5-10 minutes until frothy—I learned this the hard way after a few dense, sad buns.
- Use Room-Temp Butter: Take the unsalted butter out 30 minutes before mixing; cold butter won’t incorporate smoothly into the dough and you’ll end up with uneven texture.
- Skip Over-Kneading: Mix just until the dough pulls away from the bowl—overworking it makes the buns tough, and nobody wants a chewy pork floss bun.
- Brush With Milk: Before baking, give the buns a light coat of whole milk for that golden, glossy finish you see at BreadTalk—sounds simple, but it actually changes the outcome.
Essential Equipment for breadtalk pork floss bun
Stand Mixer Essentials
I swear by my KitchenAid Artisan Series for the dough—its 325-watt motor handles bread flour like a dream. The dough hook attachment is non-negotiable for that 8-10 minute knead to develop proper gluten structure. 💪
Precision Temperature Tools
A digital instant-read thermometer (I use ThermoWorks Thermapen) ensures your milk hits exactly 110°F for yeast activation. Too hot kills the yeast, too cold slows proofing.
For the pork floss, a candy thermometer helps monitor caramelization at 300°F in the pan.
Baking Must-Haves
Invest in half-sheet pans with parchment paper—I prefer Nordic Ware for even heat distribution. A pastry brush helps apply egg wash if you want extra shine on your buns.
Pork Prep Gear
For shredding pork shoulder, two forks work but a stand mixer with paddle attachment saves time. I use my KitchenAid again—shreds 1 lb in 30 seconds. A fine-mesh strainer helps separate crispy bits from oil during cooking. 🔥
Nutrition Facts
Frequently Asked Questions
Can I make the dough ahead of time?
Yes! After kneading, let the dough rise in the fridge overnight for deeper flavor.
How do I know when the pork floss is ready?
It should be crispy, light brown, and separate into fine strands. Cook for 10-12 minutes on medium heat.
Why didn’t my buns rise?
Check your yeast freshness and milk temperature—110°F is ideal. Too hot or cold prevents activation.
Can I use store-bought pork floss?
Look for it in Asian grocery stores. Warm and crisp it in a dry pan before topping.

- Ground Pork Menudo Recipe: Traditional Mexican Stew with Spiced Depth - November 7, 2026
- Ground Pork Seasoning Recipe: Bold Spice Blend for Savory Dishes - November 7, 2026
- Grilled Teriyaki Pork Tenderloin Recipe: Sweet and Savory Charred Glaze - November 7, 2026